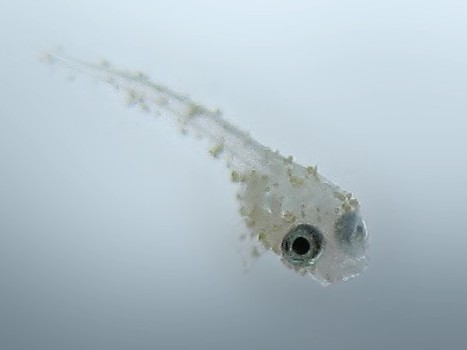
The first 30 days of fry life are the most intense period of a breeding project. Fry free-swim on day 4 or 5 after spawning, at which point they need food in hours, not days. The feeding schedule runs 4 to 6 times per day with live micro-food (infusoria first, baby brine shrimp starting day 5-6, microworms by day 15). Water changes are siphoned through airline tubing in tiny daily increments. By day 30, fry are 10-15 mm long and beginning to look like actual bettas (PMC9334006).
Mortality is significant regardless of care quality. Expect to lose 30 to 50% of hatched fry to day 30. The survivors are the fry worth raising.
The first-week timeline
Day 0: Spawning. (See spawning methods.)
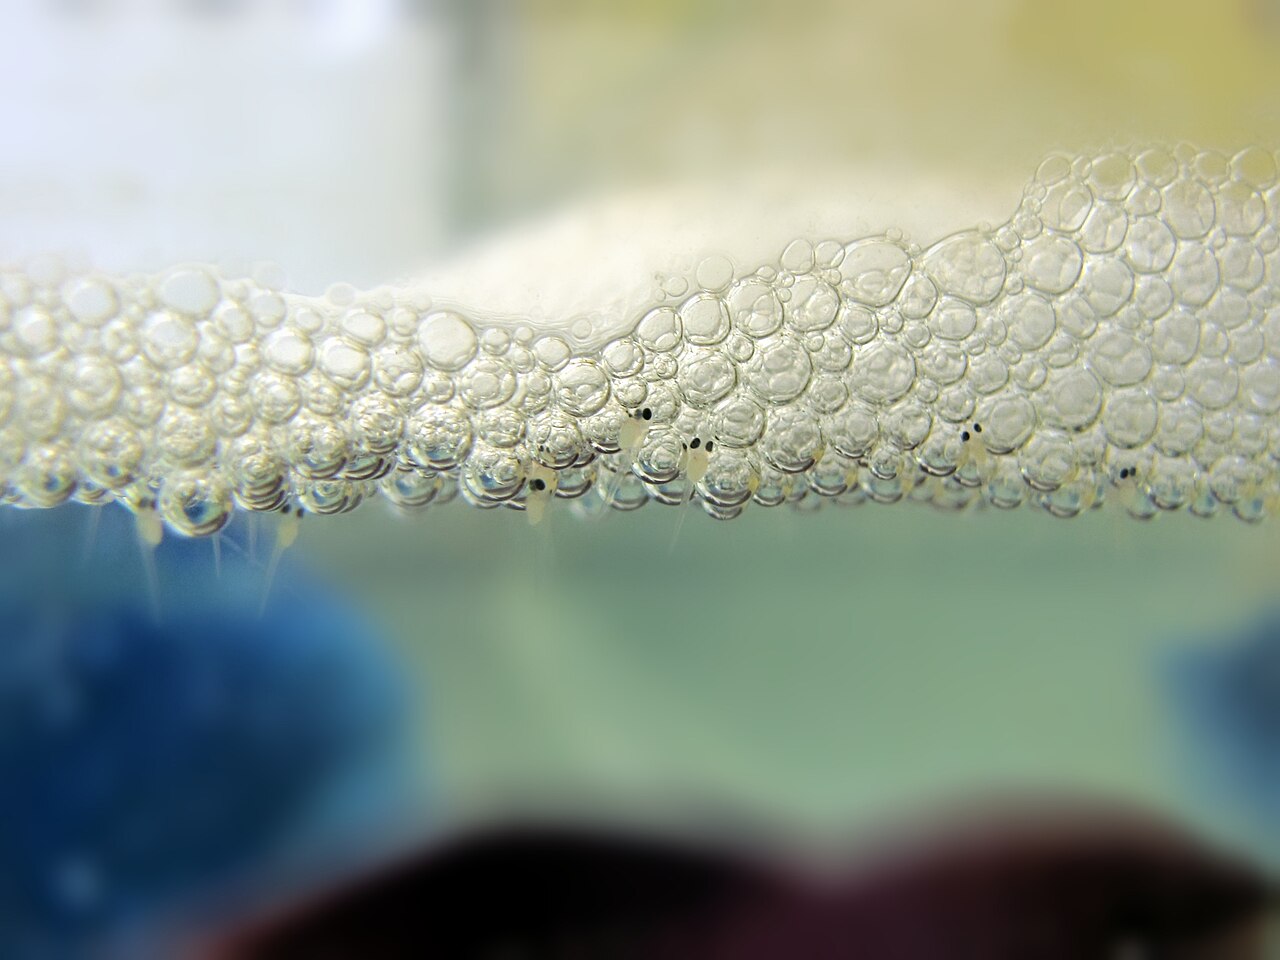
Day 1-2: Eggs in the nest. Male tends. You do nothing.
Day 2-3: Hatch. Fry emerge tail-first, hang from the nest, yolk sac visible. No feeding yet. Male continues to tend.
Day 4-5: Free swim. Fry swim horizontally in short bursts. Yolk sac reabsorbed. Remove the male. First feeding begins.
Day 5-10: Infusoria stage. Fry eat microscopic organisms 3 to 4 times per day. Introduce baby brine shrimp around day 6-7.
Day 10-15: BBS primary. Most fry are now taking BBS. Infusoria fades out.
Day 15-30: Diverse diet. BBS plus microworms plus small daphnia. Growth accelerates.
What to feed, in order
Days 5-8: Infusoria or vinegar eels
Infusoria is a generic term for microscopic aquatic organisms (paramecium, euglena, and similar ciliates and flagellates). You culture it before the spawn:
- A 2-liter bottle half-filled with tank water.
- Add a few dried banana peel pieces, a small amount of yeast, or a pinch of rabbit pellets.
- Let sit 5 to 7 days on a warm windowsill. The water becomes cloudy, then clear with visible motion.
- Feed by eyedropper: 5 to 10 drops into the fry tank, 3 to 4 times per day.
Vinegar eels are an easier alternative. A starter culture of Turbatrix aceti lives in apple cider vinegar diluted with water. Harvest with a funnel setup: eels concentrate at the water-air interface above the vinegar. Feed 5 to 10 drops per feeding.
Days 6-15: Baby brine shrimp (BBS)
BBS is Artemia salina hatched from dried eggs. The standard fry food worldwide:
- 2-liter bottle inverted (top cut off and reversed), air stone at bottom.
- 1 liter water + 1 tablespoon marine salt + 1/8 teaspoon BBS eggs.
- 24 to 36 hours at 27 °C with air stone running.
- Turn off air, let eggs settle, siphon hatched BBS from the bottom.
- Rinse with fresh water through a fine net. Feed.
Yield per batch: enough to feed a 200-fry tank 4-5 times. Hatch a new batch every 24 hours.
BBS can be fed to betta fry starting day 5-7 depending on fry size. Offer small amounts; if fry chase, they can eat it.
Days 15-25: Microworms
Panagrellus microworms are a tiny soil nematode, cultured in oatmeal:
- 16 oz deli container with 1/2 cup cooked oatmeal and a pinch of yeast.
- Add starter culture, cover loosely.
- Worms appear on the container walls within 3-5 days.
- Harvest by wiping a finger along the wall, rinse worms into the fry tank.
Microworms are slightly smaller and less nutritious than BBS, but different enough to add diversity. Use alongside BBS, not as replacement.
Days 25-30: Introduce crushed pellets
Take a high-quality pellet (New Life Spectrum or similar) and crush to fine powder. Offer small amounts sprinkled at the surface. Some fry take immediately; others need 1-2 weeks to transition. Continue BBS during transition.
Water management
No water changes for the first week. The male’s nest-tending has the tank stable; disturbing it stresses fry.
Daily small water changes starting day 7-8. Using airline tubing as a gentle siphon:
- Put one end of the airline in the tank at the waste accumulation area.
- Suck gently on the other end to start siphon (or use a small syringe to start).
- Drain 5 to 10% of water volume into a bucket.
- Replace with tank-matched (temperature, dechlorinator) water added slowly at the tank edge.
This removes waste without the fry being disturbed. The tiny tubing prevents fry from being siphoned out.
Temperature. Stable 27 °C. A cold swing kills fry within hours.
Air. Fry need surface access as the labyrinth organ develops around week 4. Never seal the tank top. A light lid to prevent drafts and jumping is fine.
The labyrinth organ develops around week 4
At hatch, fry are obligate gill breathers. The labyrinth organ is not yet functional.
Around week 3 to 4, the labyrinth organ develops. This is a critical transition:
- Fry begin gulping air at the surface for the first time.
- Surface air must be warm (within 2 °C of water temperature) or the fry get respiratory infections.
- Cold drafts kill fry at this stage faster than at any other.
- Keep the tank covered, warm, and undisturbed.
Milestones
| Day | Size | Milestone |
|---|---|---|
| 0 | none | Spawning |
| 1-2 | none | Eggs in nest |
| 3 | 2 mm | Hatch, hanging from nest |
| 5 | 3-4 mm | Free swim, first feed |
| 10 | 5-6 mm | Taking BBS consistently |
| 15 | 6-8 mm | Pigment starts appearing |
| 20 | 8-10 mm | Sex differences barely visible |
| 25 | 10-12 mm | Taking multiple food types |
| 30 | 12-15 mm | Color becomes visible |
Mortality and culling
Fry mortality is normal. Dead fry are removed daily with the siphon to prevent water fouling.
Major mortality events to watch for:
- Day 5-8: Starvation. Fry that can’t find/catch food die quickly. Consistent infusoria presence matters.
- Day 10-15: Disease. Overfed tanks develop bacteria that attack weak fry. Water management critical.
- Week 3-4: Labyrinth transition. Cold drafts kill. Cover tank, stable warmth.
- Week 4-5: Genetic deformities emerge. Spinal problems, swim bladder issues, fin defects. Affected fry are culled humanely (clove oil, small dose in small container, same protocol as adult).
Culling is part of the hobby. A fry with a visible spine curve at week 4 will never be a functional fish; humane euthanasia now beats a life of struggle. See culling ethics for the ethical framework.
End of day 30
By day 30, fry are:
- 10 to 15 mm long.
- Taking multiple food types including crushed pellets.
- Beginning to show color and pigment pattern.
- Starting to claim small territories on plant leaves.
The intensive first-month phase ends here. Weeks 5 to 12 are juvenile grow-out with less frantic feeding but more space requirements, male separation starting around week 8, and eventual jarring. See the breeding gear guide for the hardware that carries the project through to week 16 and sellable juveniles.
The first 30 days is the hardest part. If you’re awake for daily siphon water changes, cultures are running, and fry are growing, you’re doing it right.
Related on this site
- How to Breed Betta Fish: A Breeder’s Complete Guide
- Betta Breeding Gear Guide: What You Need and What to Skip
- Betta Breeding Conditioning: The 14-Day Protocol
- Culling in Betta Breeding: The Ethical Framework
- Betta Breeding FAQ: The 20 Questions New Breeders Ask
Frequently asked
- Why can't I feed baby brine shrimp from day 1?
- Betta fry mouths are tiny at free-swim. Some strains take BBS on day 5, but many need smaller food (infusoria or vinegar eels) for the first 3 to 5 days. Offering both gives flexibility.
- How often do I feed?
- 4 to 6 times per day in the first 2 weeks. Small amounts. Growth is slow if underfed. Water quality crashes fast if overfed.
- Do I need a filter?
- Not in the first 2 weeks. Fry get sucked into filter intakes. After day 15, a sponge filter at very low flow is fine.
- Why is my fry count dropping?
- Normal. 30 to 50 percent fry mortality in the first 30 days is standard even in good conditions. Weaker fry die young. Survivors are the ones with viable genetics and healthy start.
- When do fry look like actual bettas?
- Around week 6 to 8 color starts appearing and fins elongate. Before that they look like generic small fish.